设置数据库
Django 默认使用 SQLite 数据库,这对于开发和测试来说非常方便,因为它不需要额外的配置和安装。但是在生产环境中,通常会使用更强大和可靠的数据库,例如 PostgreSQL、MySQL 或 Oracle。
本节课程先介绍如何使用 SQLite 数据库,后续课程会将重心逐渐转移到 MySQL 上。
创建 migration
Django 使用迁移(migration)来管理数据库模式的变化。当我们定义或修改模型时,需要创建迁移文件并应用它们来更新数据库结构。
使用如下命令来创建迁移文件:
python manage.py makemigrations
根据上一章内容,我们可以得到:
❯ python manage.py makemigrations
Migrations for 'store':
  store/migrations/0001_initial.py
    - Create model Cart
    - Create model Collection
    - Create model Customer
    - Create model Order
    - Create model Promotion
    - Create model Address
    - Create model Product
    - Create model OrderItem
    - Add field featured_product to collection
    - Create model CartItem
Migrations for 'tags':
  tags/migrations/0001_initial.py
    - Create model Tag
    - Create model TaggedItem
Migrations for 'likes':
  likes/migrations/0001_initial.py
    - Create model LikedItem
以 macOS 为例,迁移文件默认保存在 migrations 目录下,鼠标悬浮到文件名后摁住 command 并点击:
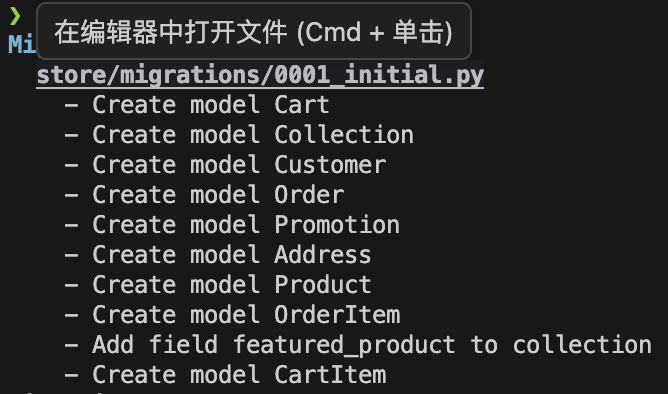
即可跳转到对应的迁移文件:
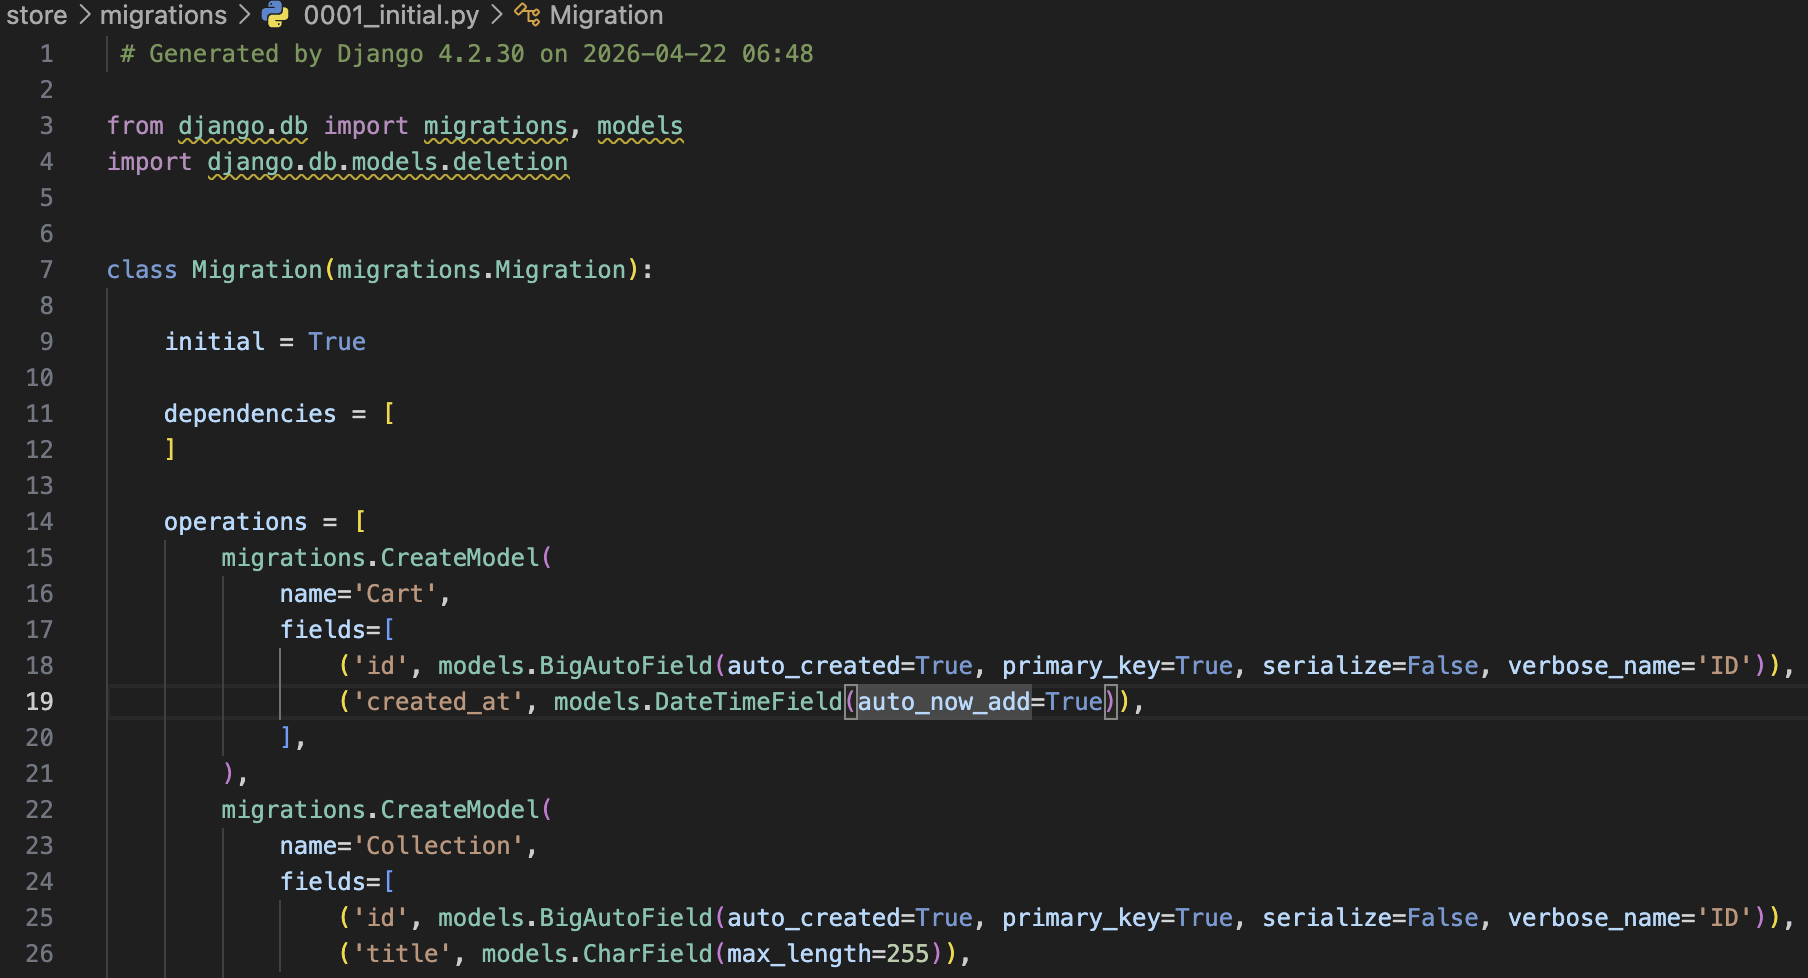
在上一章我们提到过,不需要额外给数据模型创建自增主键字段,Django 会自动为每个模型添加一个名为 id 的 AutoField 字段作为主键。
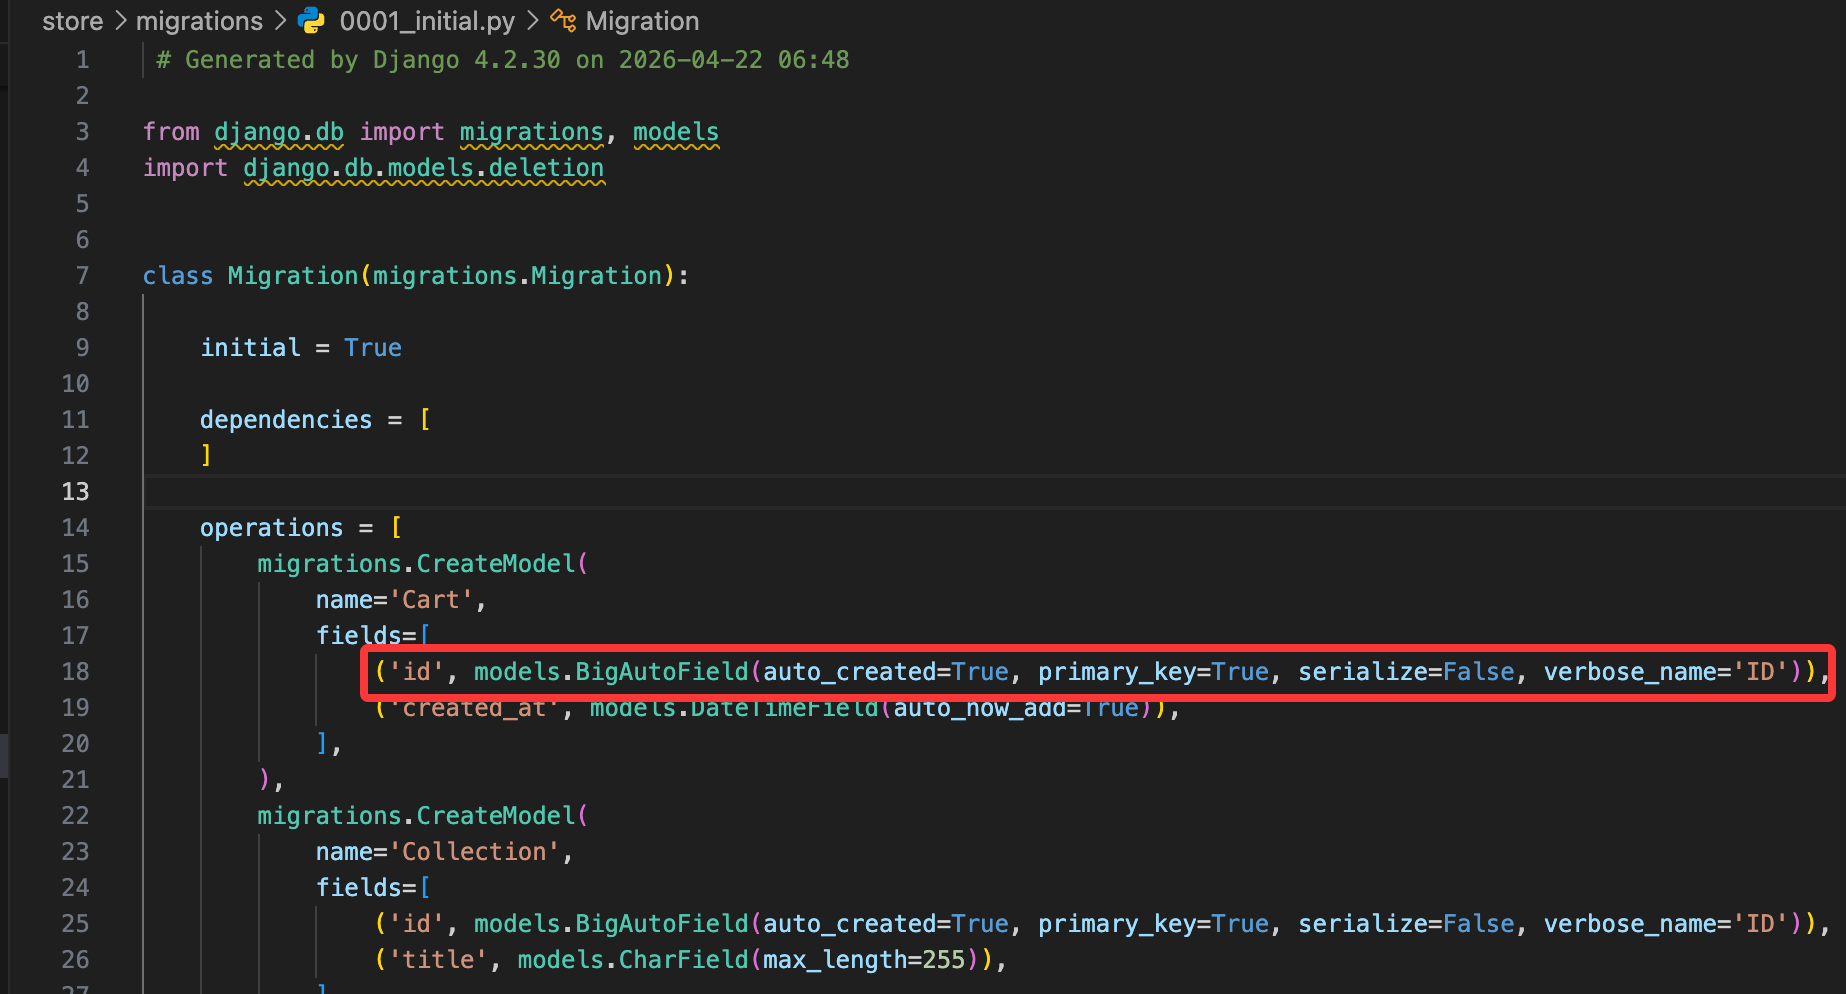
Django 会自动将这部分内容转换成SQL语句来运行。如果构建了新的模型或者修改了现有模型的字段,就需要重新运行 makemigrations 来生成新的迁移文件。
假设我们修改了 Product 模型,将字段 price 修改为 unit_price:
class Product(models.Model):
    title = models.CharField(max_length=255)
    description = models.TextField()
    price = models.DecimalField(max_digits=6, decimal_places=2)
    unit_price = models.DecimalField(max_digits=6, decimal_places=2)
    inventory = models.IntegerField()
    last_updated = models.DateTimeField(auto_now=True)
    collection = models.ForeignKey(Collection, on_delete=models.PROTECT)
    promotions = models.ManyToManyField(Promotion)
保存并再次运行 makemigrations:
python manage.py makemigrations
Was product.price renamed to product.unit_price (a DecimalField)? [y/N] y
Migrations for 'store':
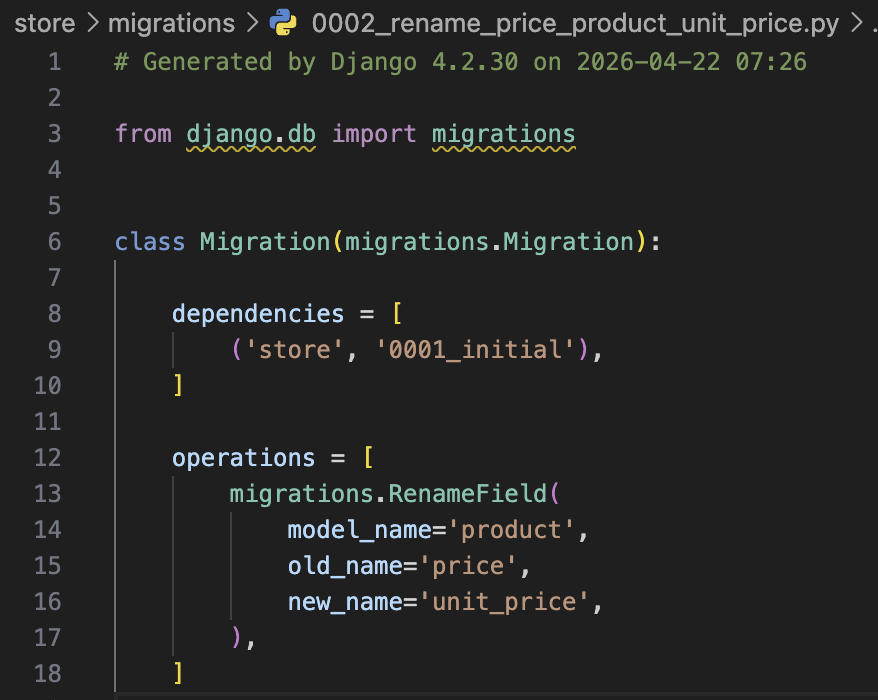
store/migrations/0002_rename_price_product_unit_price.py
- Rename field price on product to unit_price
此时 Django 会检测到 price 字段被删除了,同时又新增了一个 unit_price 字段,并且它们的类型相同,因此会询问我们是否将 price 字段重命名为 unit_price。确认后我们可以看到产生了一个新的迁移文件 0002_rename_price_product_unit_price.py,里面包含了重命名字段的操作:
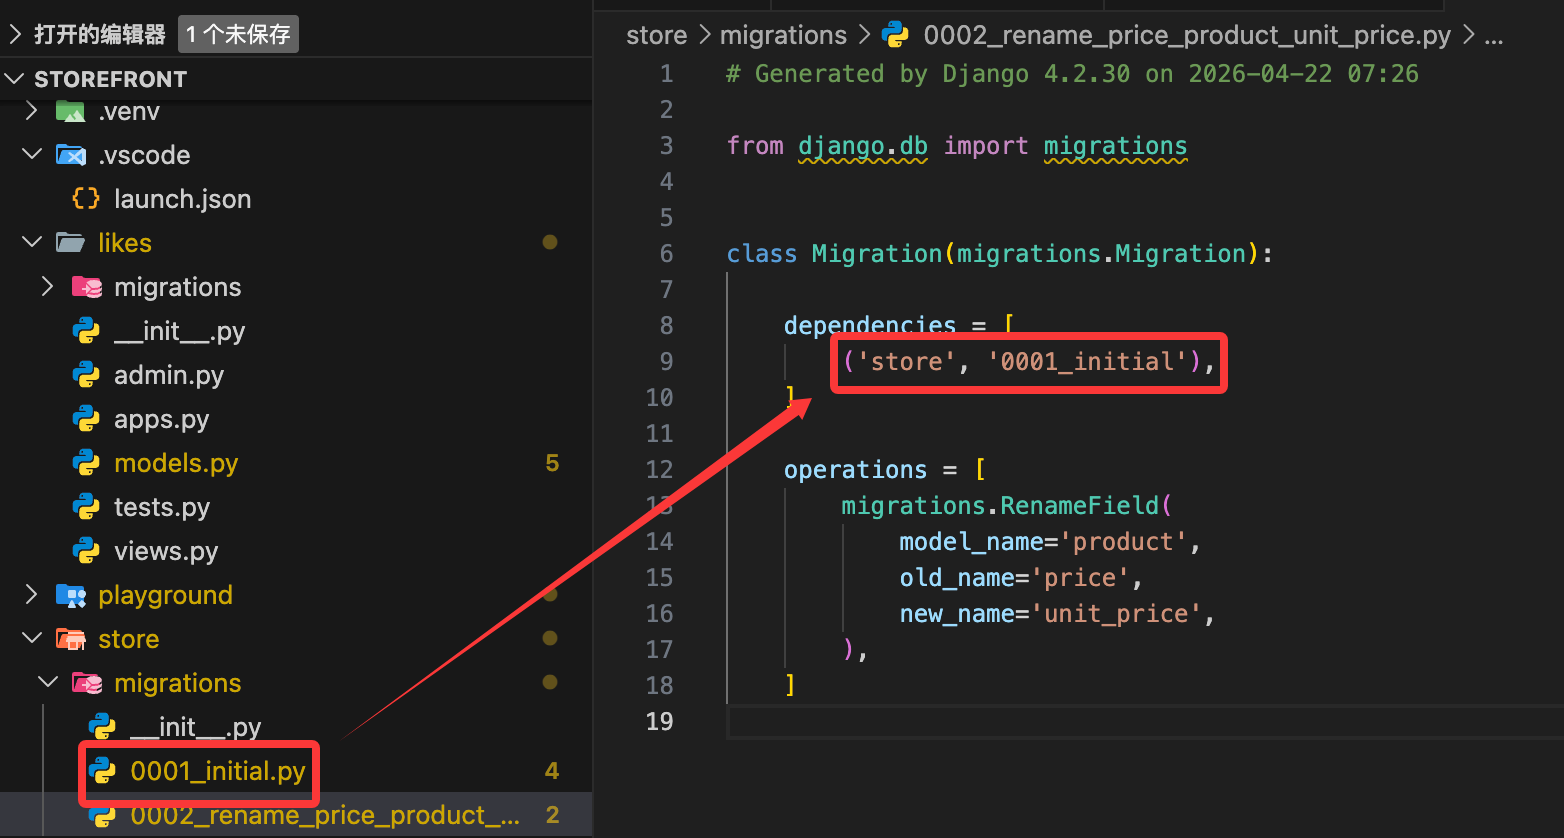
migration 文件名可以修改,但必须确保引用正确,以下图为例,如果要把 0001_initial.py 修改为 0001_setup.py,需要同时修改被引用的迁移文件中的 dependencies,否则迁移失败。
如果没有更改任何内容,执行 makemigrations:
python manage.py makemigrations
此时提示没有变化:
No changes detected
如果你发现自己有修改模型,执行 makemigrations,如果仍然提示没有变化,可能是因为:
- 没有保存更改内容
- 忘记添加应用程序
我们回到 Product 模型,添加一个新的字段 slug:
class Product(models.Model):
    title = models.CharField(max_length=255)
    slug = models.SlugField()
    description = models.TextField()
    unit_price = models.DecimalField(max_digits=6, decimal_places=2)
    inventory = models.IntegerField()
    last_updated = models.DateTimeField(auto_now=True)
    collection = models.ForeignKey(Collection, on_delete=models.PROTECT)
    promotions = models.ManyToManyField(Promotion)
slug 是一个简短的标签,通常用于 URL 中,表示资源的唯一标识符,例如
my-awesome-product。Django 提供了SlugField字段类型来存储 slug。
保存后执行 makemigrations:
python manage.py makemigrations
It is impossible to add a non-nullable field 'slug' to product without specifying a default. This is because the database needs something to populate existing rows.
Please select a fix:
 1) Provide a one-off default now (will be set on all existing rows with a null value for this column)
 2) Quit and manually define a default value in models.py.
由于我们添加了一个新的字段 slug,但是没有为现有的行提供默认值,因此 Django 无法确定如何填充这个字段。我们可以选择提供一个一次性的默认值,或者退出并在 models.py 中手动定义一个默认值。
如果选择了第一种方式,输入的内容必须使用引号括起来,例如'-'。操作完成迁移后,我们打开对应的迁移文件,可以看到:
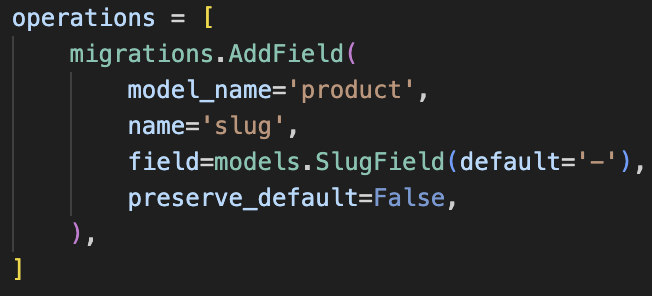
也就是说,如果选择第一种方式,这个default值只会出现在迁移文件中,而不会出现在模型定义中,并且只会使用一次。
运行 migration
每个 migration 就像一个版本控制系统中的提交一样,记录了数据库模式的变化。我们可以使用如下命令来应用迁移:
python manage.py migrate
这会将所有未应用的迁移文件按照顺序执行,更新数据库结构。执行完成后,我们可以看到类似如下的输出:
python manage.py migrate
Operations to perform:
  Apply all migrations: admin, auth, contenttypes, likes, sessions, store, tags
Running migrations:
  Applying contenttypes.0001_initial... OK
  Applying auth.0001_initial... OK
  Applying admin.0001_initial... OK
  Applying admin.0002_logentry_remove_auto_add... OK
  Applying admin.0003_logentry_add_action_flag_choices... OK
  Applying contenttypes.0002_remove_content_type_name... OK
  Applying auth.0002_alter_permission_name_max_length... OK
  Applying auth.0003_alter_user_email_max_length... OK
  Applying auth.0004_alter_user_username_opts... OK
  Applying auth.0005_alter_user_last_login_null... OK
  Applying auth.0006_require_contenttypes_0002... OK
  Applying auth.0007_alter_validators_add_error_messages... OK
  Applying auth.0008_alter_user_username_max_length... OK
  Applying auth.0009_alter_user_last_name_max_length... OK
  Applying auth.0010_alter_group_name_max_length... OK
  Applying auth.0011_update_proxy_permissions... OK
  Applying auth.0012_alter_user_first_name_max_length... OK
  Applying likes.0001_initial... OK
  Applying sessions.0001_initial... OK
  Applying store.0001_initial... OK
  Applying store.0002_rename_price_product_unit_price... OK
  Applying store.0003_rename_name_product_title... OK
  Applying store.0004_product_slug... OK
  Applying tags.0001_initial... OK
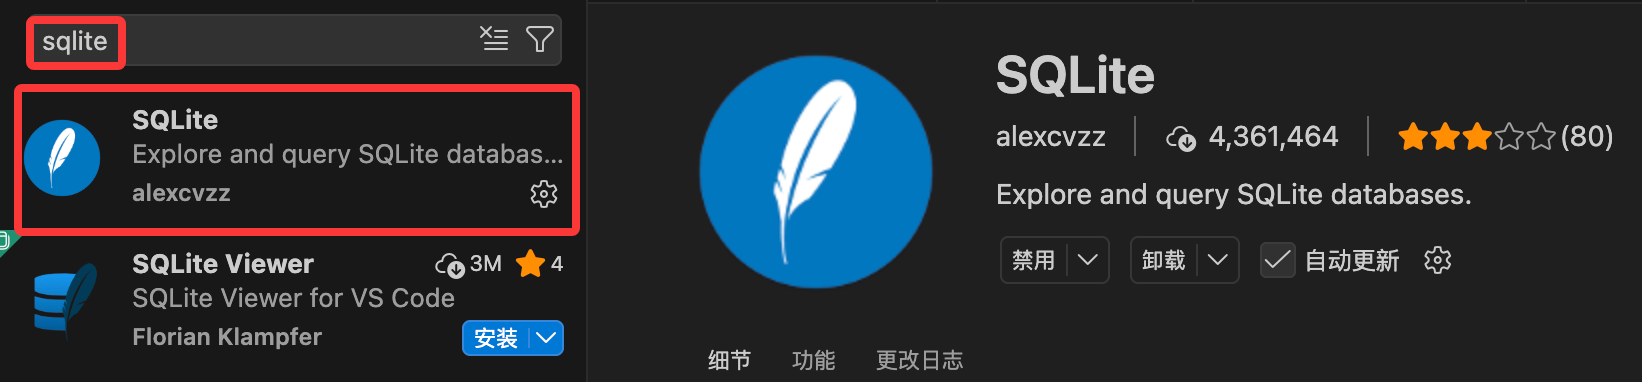
此时能看到项目下生成了一个新的文件 db.sqlite3,这就是 SQLite 数据库文件,里面存储了我们定义的模型对应的表结构和数据。我们可以在 VS Code 中安装 SQLite 插件来查看数据库内容:
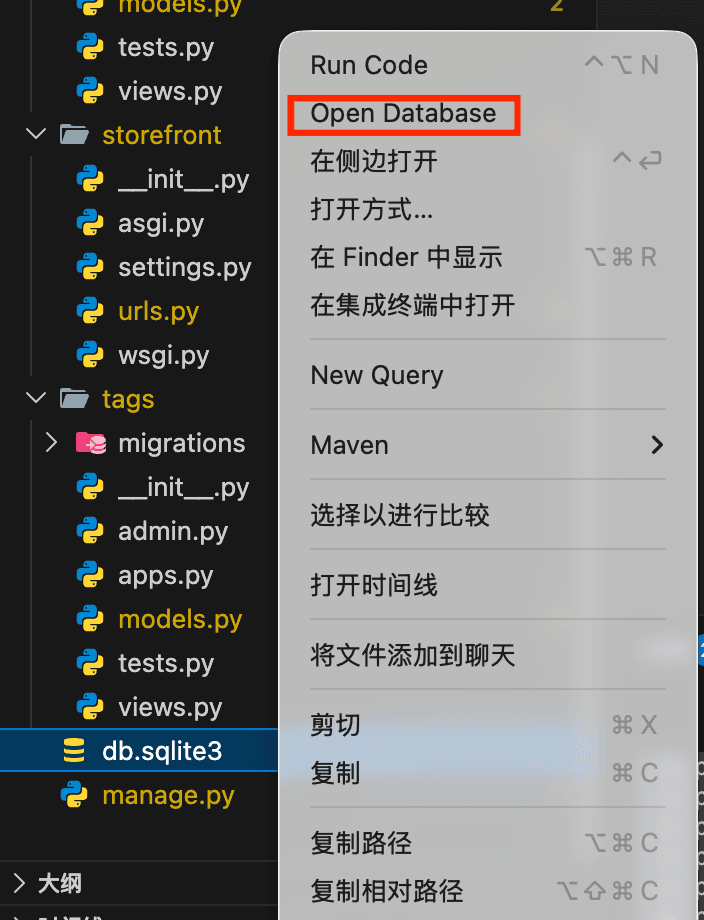
安装完成后选择要查看的数据库文件,右键点击【Open Database】
此时下方出现了一个【SQLITE EXPLORER】,可以看到数据库中的表结构:
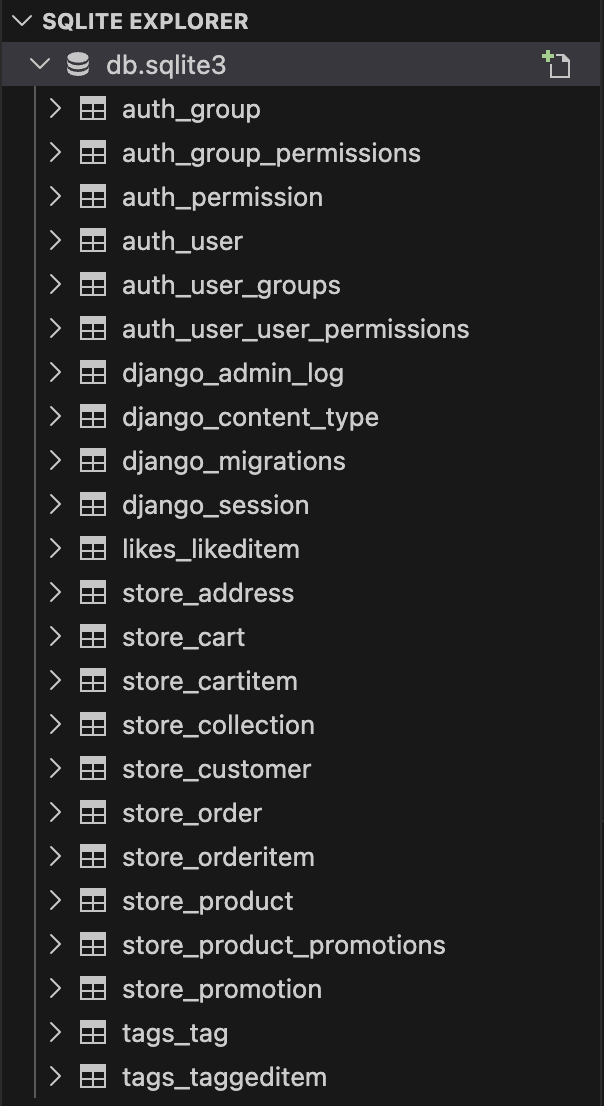
- auth - Django 内置的认证系统相关表
- contenttypes - Django 内置的内容类型系统相关表
- likes - 我们创建的 likes 应用相关表
- store - 我们创建的 store 应用相关表
- tags - 我们创建的 tags 应用相关表
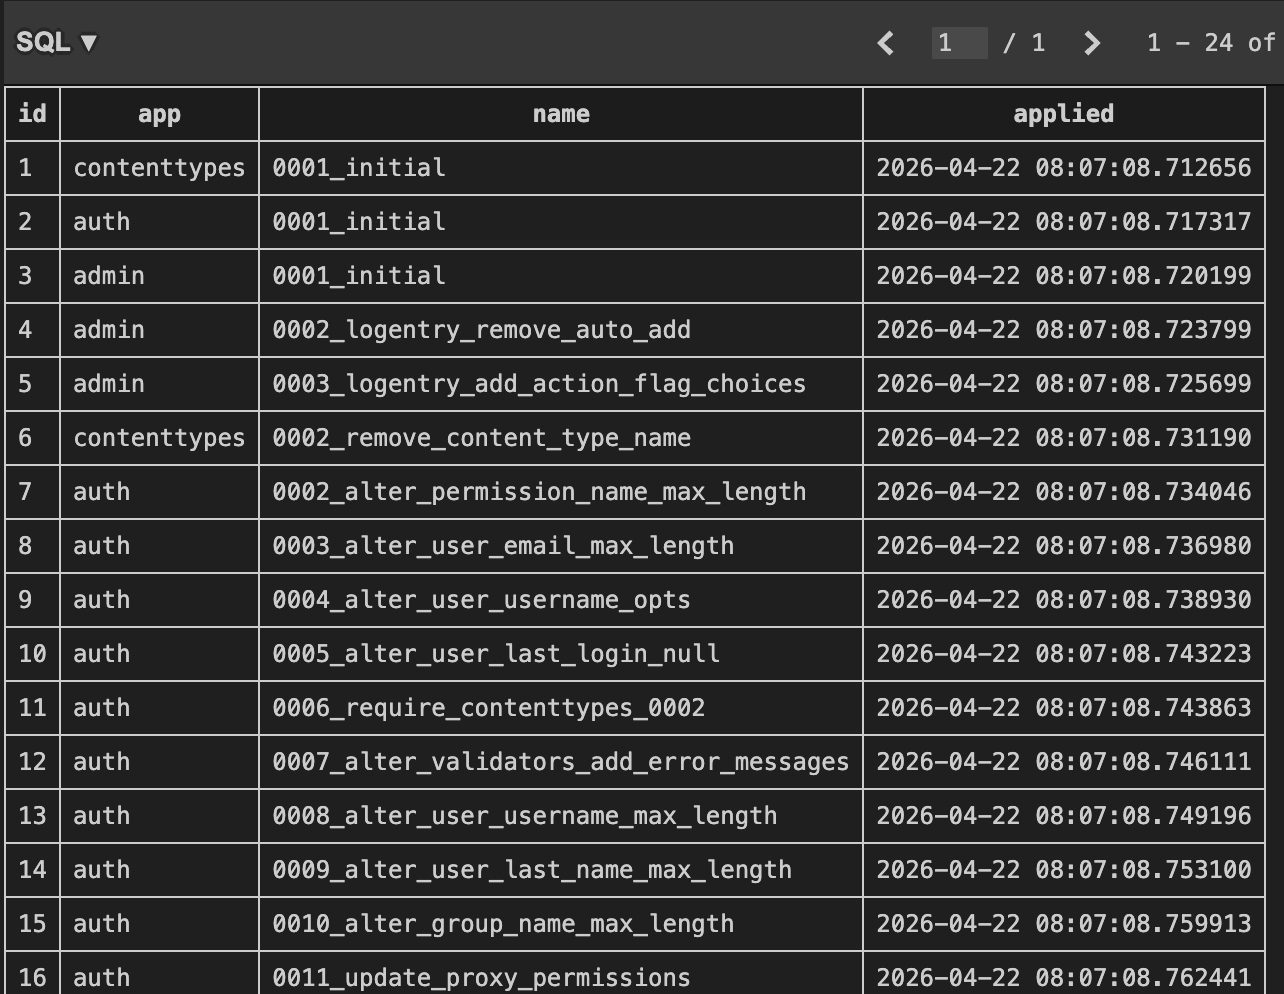
可以点击 django_migrations 表来查看已经应用的迁移记录:
如果我们现在再执行一次 python manage.py migrate:
Operations to perform:
  Apply all migrations: admin, auth, contenttypes, likes, sessions, store, tags
Running migrations:
  No migrations to apply.
由于所有的迁移都已经应用了,因此提示没有迁移需要应用。
我们还可以通过如下命令来查看某次迁移时执行的具体 SQL 命令:
python manage.py sqlmigrate <app_name> <migration_name>
以命令 python manage.py sqlmigrate store 0003 为例:
BEGIN;
--
-- Add field slug to product
--
CREATE TABLE "new__store_product" ("id" integer NOT NULL PRIMARY KEY AUTOINCREMENT, "slug" varchar(50) NOT NULL, "title" varchar(255) NOT NULL, "description" text NOT NULL, "inventory" integer NOT NULL, "last_updated" datetime NOT NULL, "collection_id" bigint NOT NULL REFERENCES "store_collection" ("id") DEFERRABLE INITIALLY DEFERRED, "unit_price" decimal NOT NULL);
INSERT INTO "new__store_product" ("id", "title", "description", "inventory", "last_updated", "collection_id", "unit_price", "slug") SELECT "id", "title", "description", "inventory", "last_updated", "collection_id", "unit_price", '-' FROM "store_product";
DROP TABLE "store_product";
ALTER TABLE "new__store_product" RENAME TO "store_product";
CREATE INDEX "store_product_slug_6de8ee4b" ON "store_product" ("slug");
CREATE INDEX "store_product_collection_id_2914d2ba" ON "store_product" ("collection_id");
COMMIT;
小练习:
- 在
Address模型中添加一个新的字段zip- 创建一次迁移并应用它
- 查看迁移总表
django_migrations,确认迁移记录
class Address(models.Model):
    street = models.CharField(max_length=255)
    city = models.CharField(max_length=255)
    customer = models.ForeignKey(Customer, on_delete=models.CASCADE, primary_key=True)
    zip = models.CharField(max_length=20, null=True)  # 新增字段
自定义架构
有时我们需要进一步操作数据库模式,比如覆写表或者添加索引等。先通过 cmd + T 或者 ctrl + T,输入 Customer,快捷跳转到 Customer 模型:
class Customer(models.Model):
    first_name = models.CharField(max_length=255)
    last_name = models.CharField(max_length=255)
    email = models.EmailField(unique=True)
    phone = models.CharField(max_length=255)
    birth_date = models.DateField(null=True)

    MEMBERSHIP_BRONZE = 'B'
    MEMBERSHIP_SILVER = 'S'
    MEMBERSHIP_GOLD = 'G'

    MEMBERSHIP_CHOICES = [
        (MEMBERSHIP_BRONZE, 'Bronze'),
        (MEMBERSHIP_SILVER, 'Silver'),
        (MEMBERSHIP_GOLD, 'Gold'),
    ]
    membership = models.CharField(max_length=1, choices=MEMBERSHIP_CHOICES, default=MEMBERSHIP_BRONZE)
    class Meta:
        db_table = 'store_customers'  # 自定义表名
        indexes = [
            models.Index(fields=['last_name', 'first_name']),
        ]
详情请见Meta
保存后执行 makemigrations:
Migrations for 'store':
  store/migrations/0004_customer_store_custo_last_na_e6a359_idx_and_more.py
    - Create index store_custo_last_na_e6a359_idx on field(s) last_name, first_name of model customer
    - Rename table for customer to store_customers
此时发现 Django 无法为这次迁移生成一个很好的名称,因为本次迁移混合了两种操作:重命名表和创建索引。
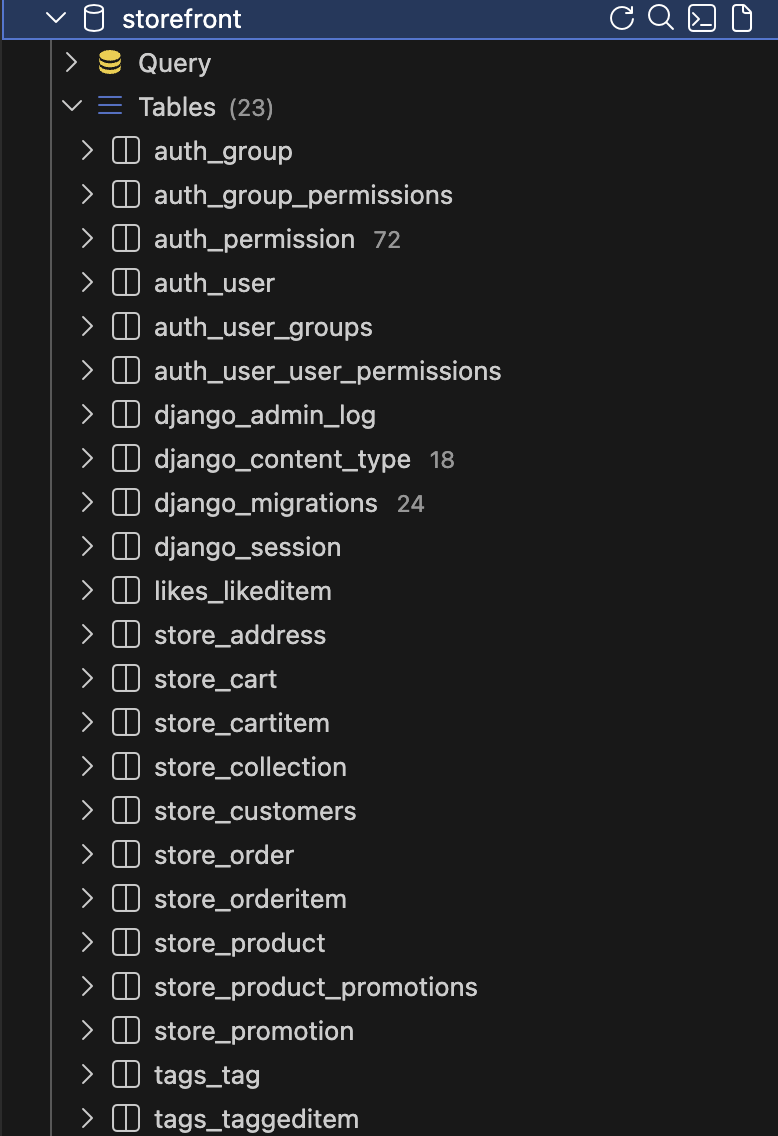
执行 migrate 后,查看 store 应用的 customer 表,此时名称已经变成了 store_customers。
撤销 migration
如果发现某次迁移有问题或者不需要了,可以使用如下命令来撤销迁移:
python manage.py migrate <app_name> <prev migration id>
以命令 python manage.py migrate store 0003 为例:
Operations to perform:
  Target specific migration: 0003_product_slug, from store
Running migrations:
  Rendering model states... DONE
  Unapplying store.0004_customer_store_custo_last_na_e6a359_idx_and_more... OK
此时在 django_migrations 表中可以看到 0004_customer_store_custo_last_na_e6a359_idx_and_more 这条迁移记录被撤销了,而在应用的 migration 子目录下仍能看到 0004_customer_store_custo_last_na_e6a359_idx_and_more.py 这个迁移文件。此时执行 python manage.py migrate,该迁移文件又会被重新应用。
但此时我们需要放弃这个迁移,因此需要删除这个迁移文件。
小练习:
- 修改Customer模型,修改
first_name字段为given_name- 创建一次迁移并应用它
- 撤销这次迁移并删除迁移文件
在 Django 中使用 MySQL
课程中虽然推荐安装 mysqlclient 来连接 MySQL 数据库,但在实际开发中,使用 mysqlclient 可能会遇到一些安装问题。一个更简单的替代方案是使用 pymysql,它是一个纯 Python 实现的 MySQL 客户端库,不需要编译 C 扩展。
使用如下命令,依据提示输入密码登录 MySQL:
mysql -u root -p
创建数据库:
CREATE DATABASE storefront;
创建完成后退出 MySQL:
exit
安装 pymysql:
pip install pymysql
安装完成后,找到 storefront/settings.py 文件,
在文件顶部添加以下代码来让 Django 使用 pymysql 作为 MySQL 的数据库引擎:
import pymysql

pymysql.install_as_MySQLdb()
找到 DATABASES 配置变量:
DATABASES = {
    'default': {
        'ENGINE': 'django.db.backends.sqlite3',
        'ENGINE': 'django.db.backends.mysql',
        'NAME': BASE_DIR / 'db.sqlite3',
        'NAME': 'storefront',
        'HOST': 'localhost',
        'USER': 'root',
        'PASSWORD': 'your_mysql_password',
        'PORT': '3306', # MySQL 默认端口,如果使用了其他端口,请修改
    }
}
执行如下命令让操作更新到数据库中:
python manage.py migrate
运行自定义SQL语句
有时我们需要更新数据库模式(?),可以通过创建空迁移实现:
python manage.py makemigrations --empty
此时出现一个空的迁移:
# Generated by Django 4.2.30 on 2026-04-22 14:37

from django.db import migrations


class Migration(migrations.Migration):

    dependencies = [
        ('store', '0004_customer_store_custo_last_na_e6a359_idx_and_more'),
    ]

    operations = [

    ]
我们可以在 operations 列表中添加一个 RunSQL 操作来执行自定义的 SQL 语句:
class Migration(migrations.Migration):

    dependencies = [
        ('store', '0004_customer_store_custo_last_na_e6a359_idx_and_more'),
    ]

    operations = [
        migrations.RunSQL("""
            INSERT INTO store_collection (title) VALUES ('collection1');
        """, """
            DELETE FROM store_collection WHERE title = 'collection1';
        """)
    ]
migrations.RunSQL 接受两个参数,第一个参数是要执行的 SQL 语句,第二个参数是撤销这个迁移时要执行的 SQL 语句。
执行 migrate 后,我们可以在数据库中看到 store_collection 表中新增了一行数据:

此时再执行 python manage.py migrate store <prev migrate id> 来撤销这个迁移,再次查看 store_collection 表,之前新增的那行数据已经被删除了:

生成 Dummy 数据
有时候需要用一些 fake 数据来填充我们的数据库,以用于测试等,这里推荐一个 fake 数据生成工具 Mockaroo,它提供了一个在线界面来配置要生成的数据结构和类型,并且支持导出为 SQL、CSV、JSON 等格式。
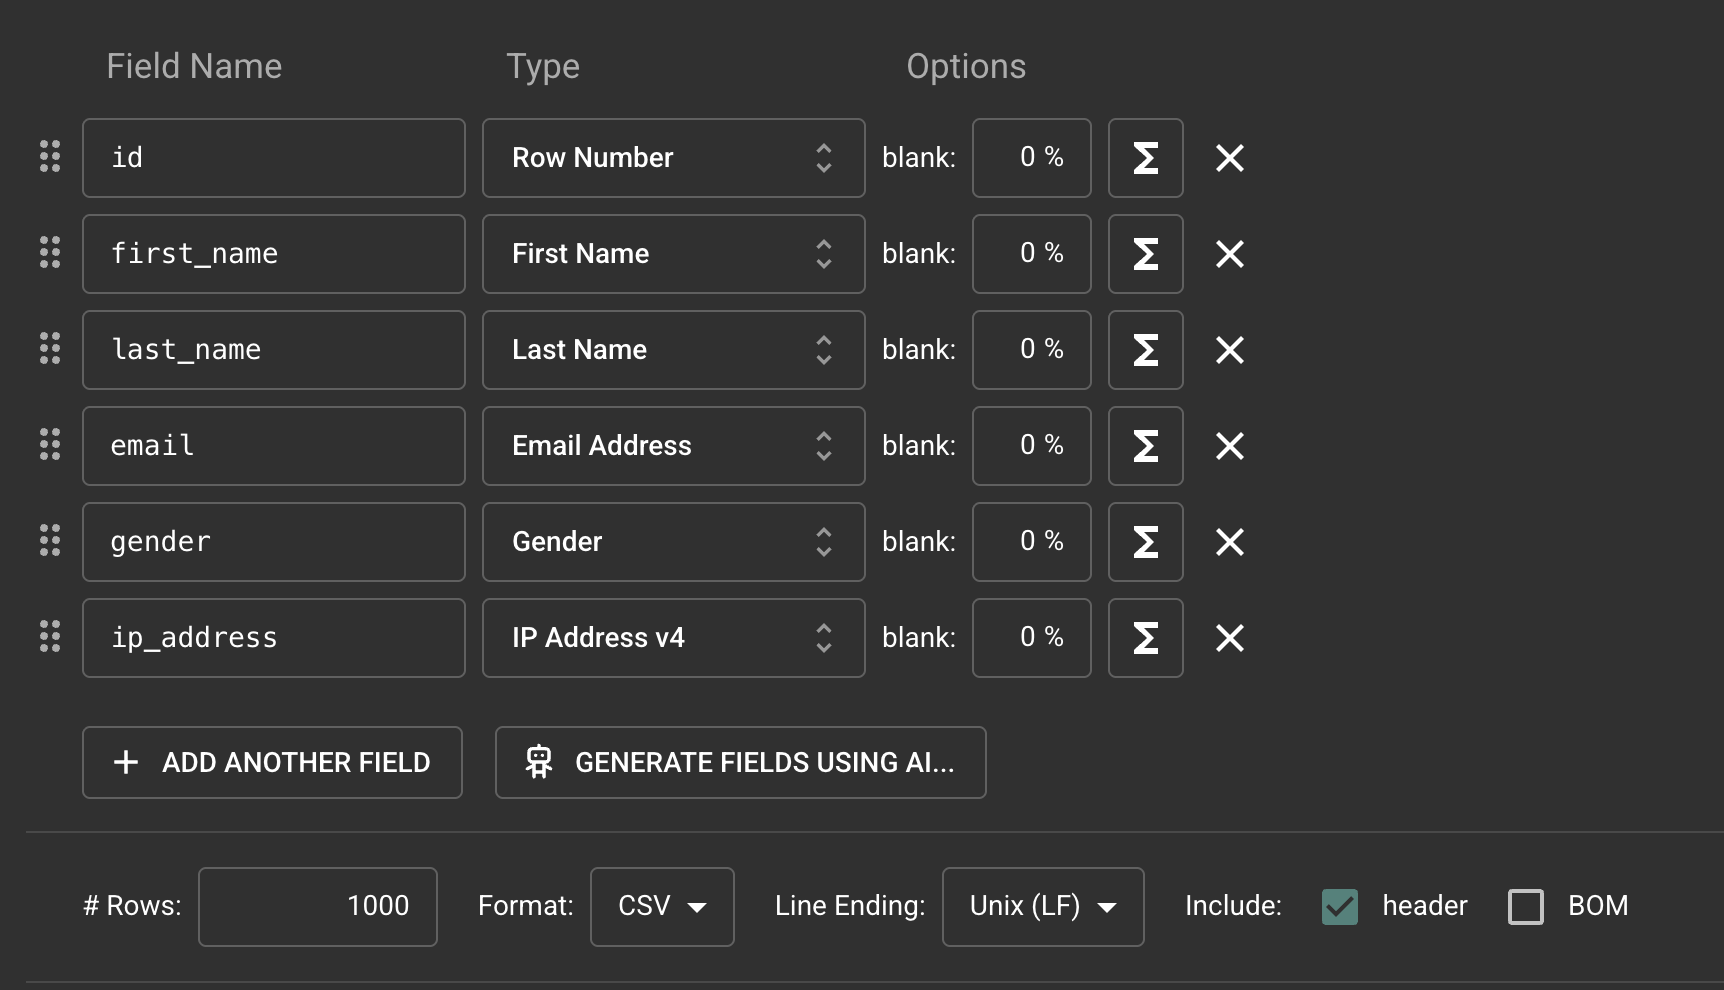
现在我们来修改一些配置:
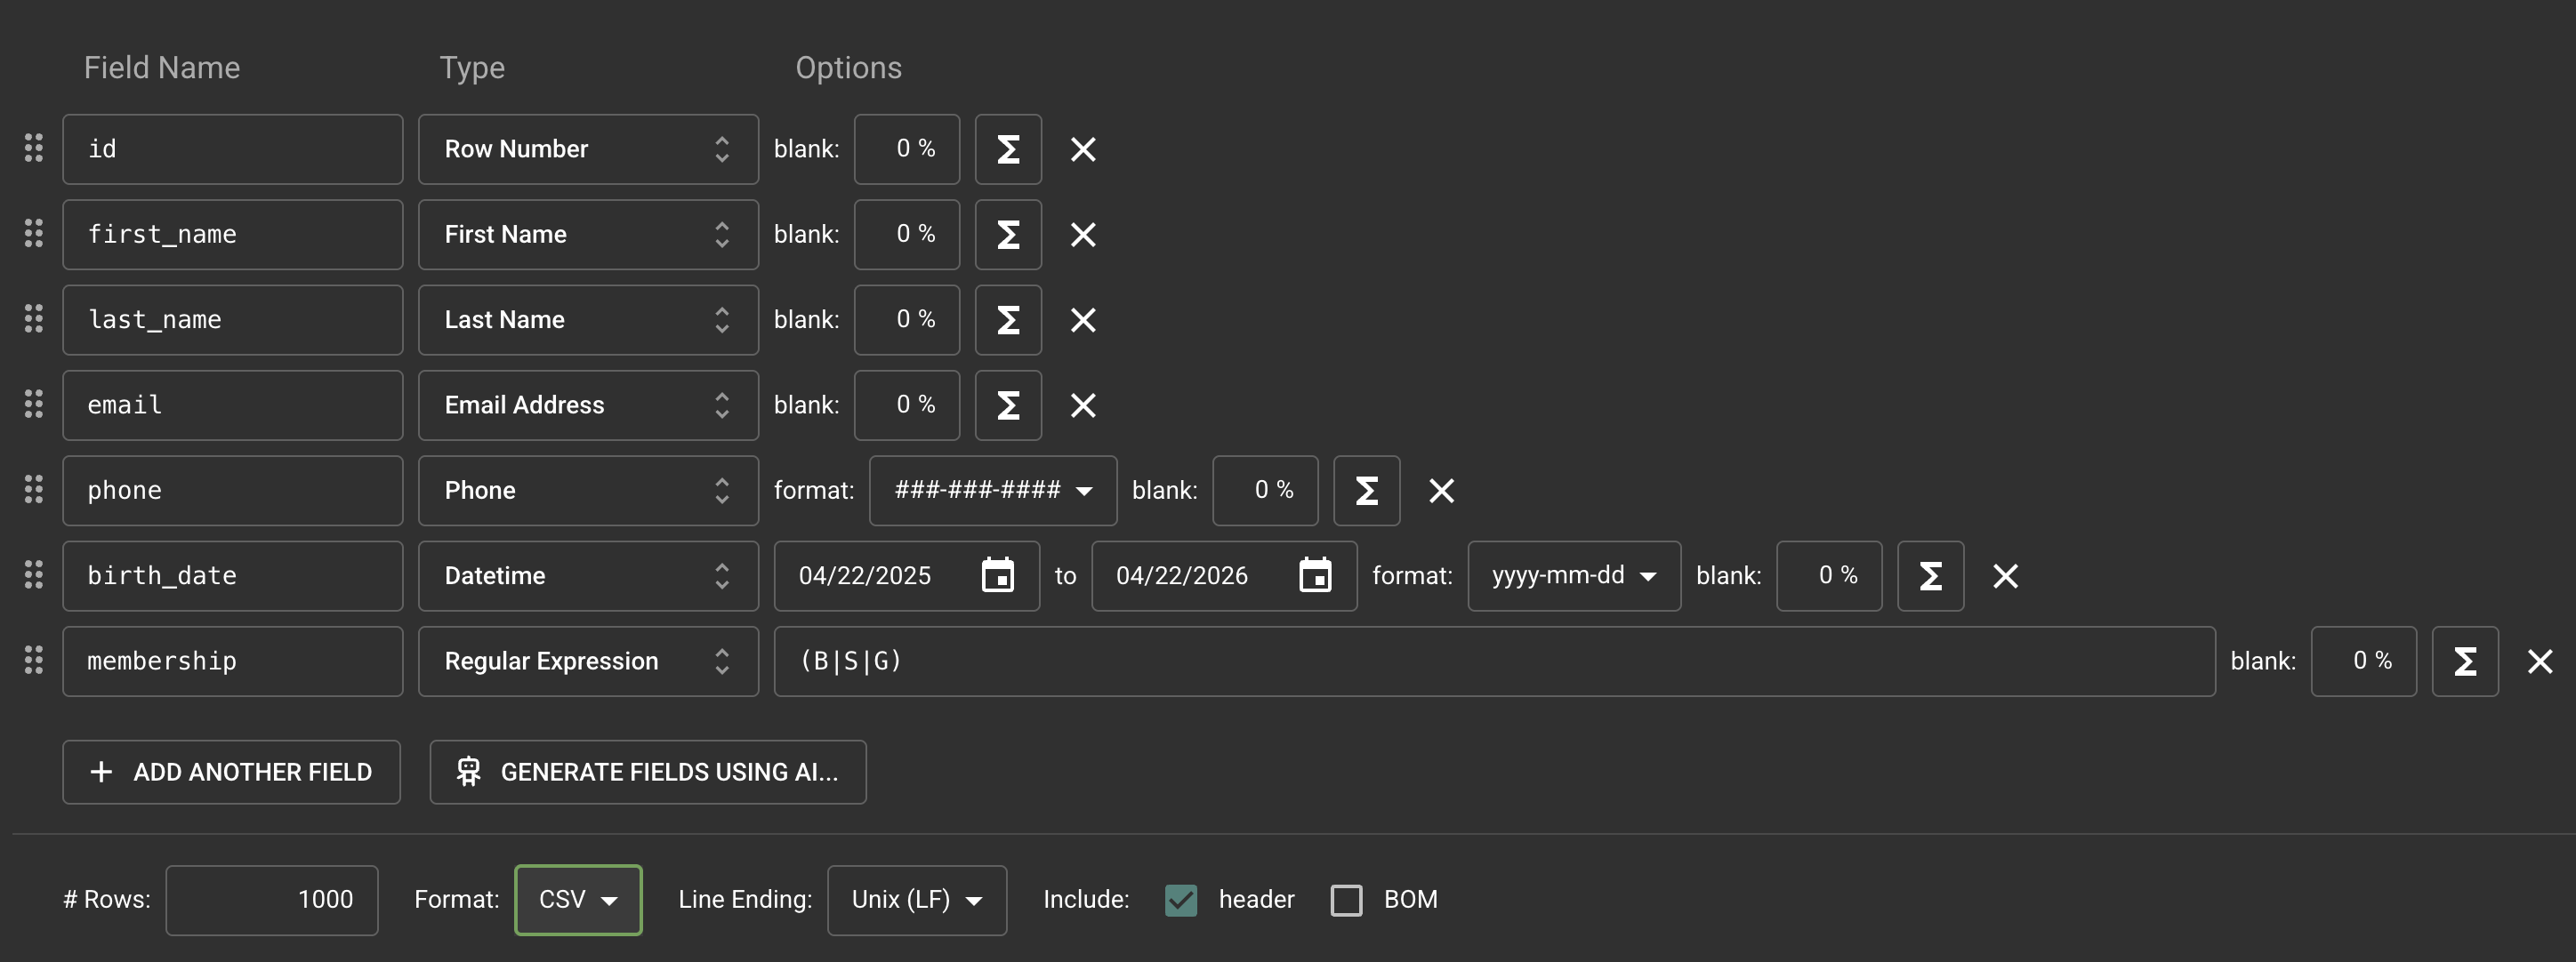
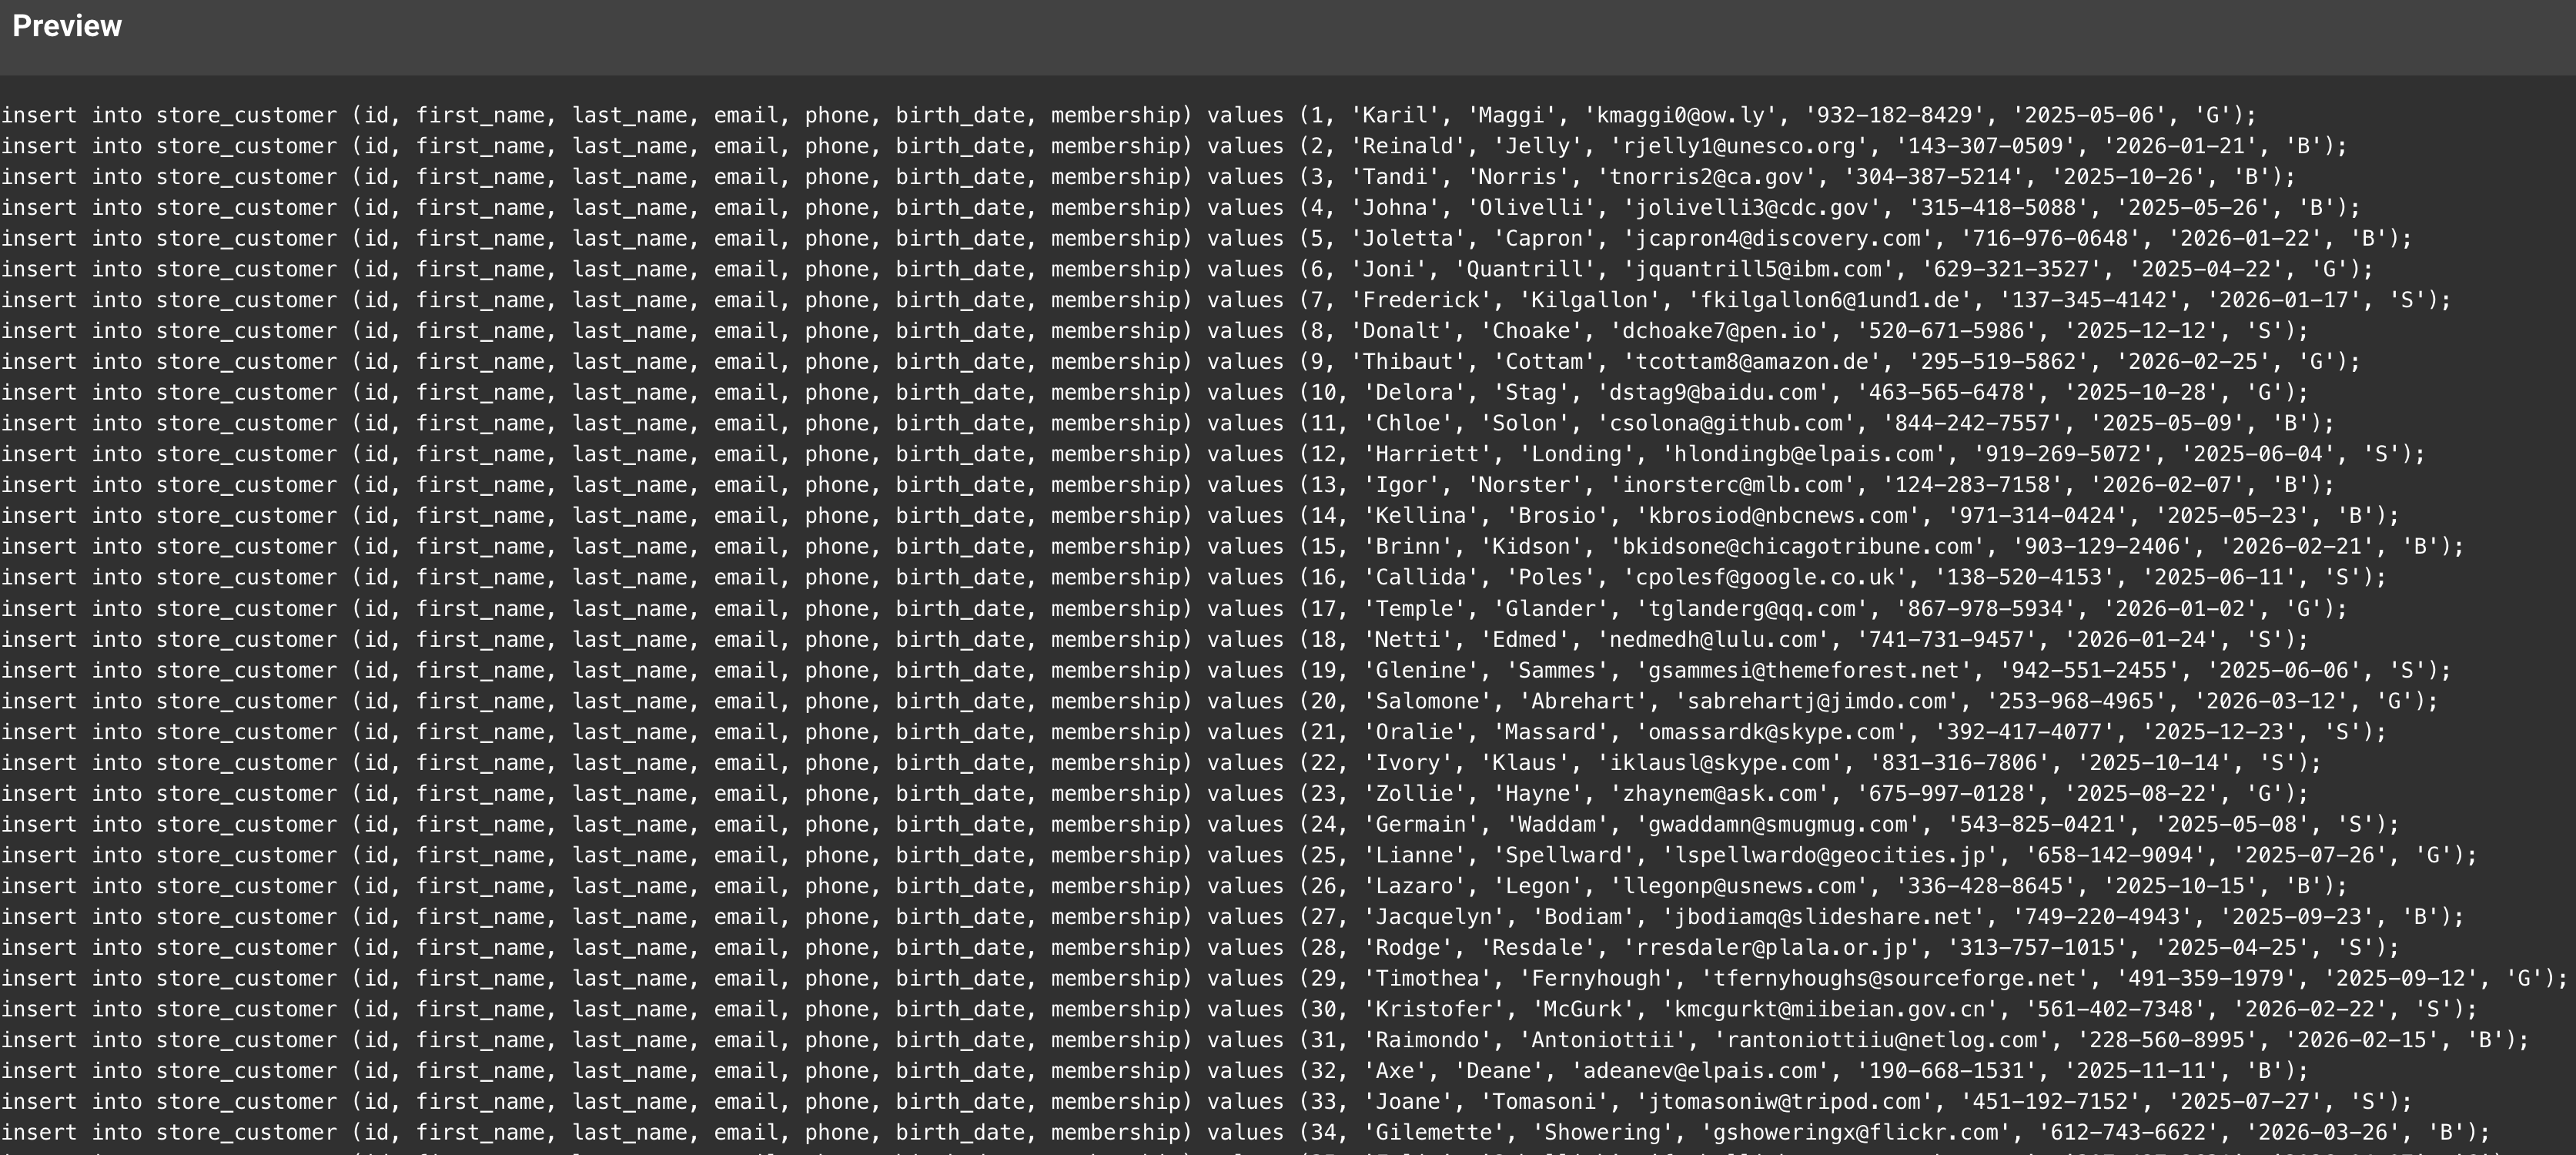
修改完成后点击【PREVIEW】进行预览:
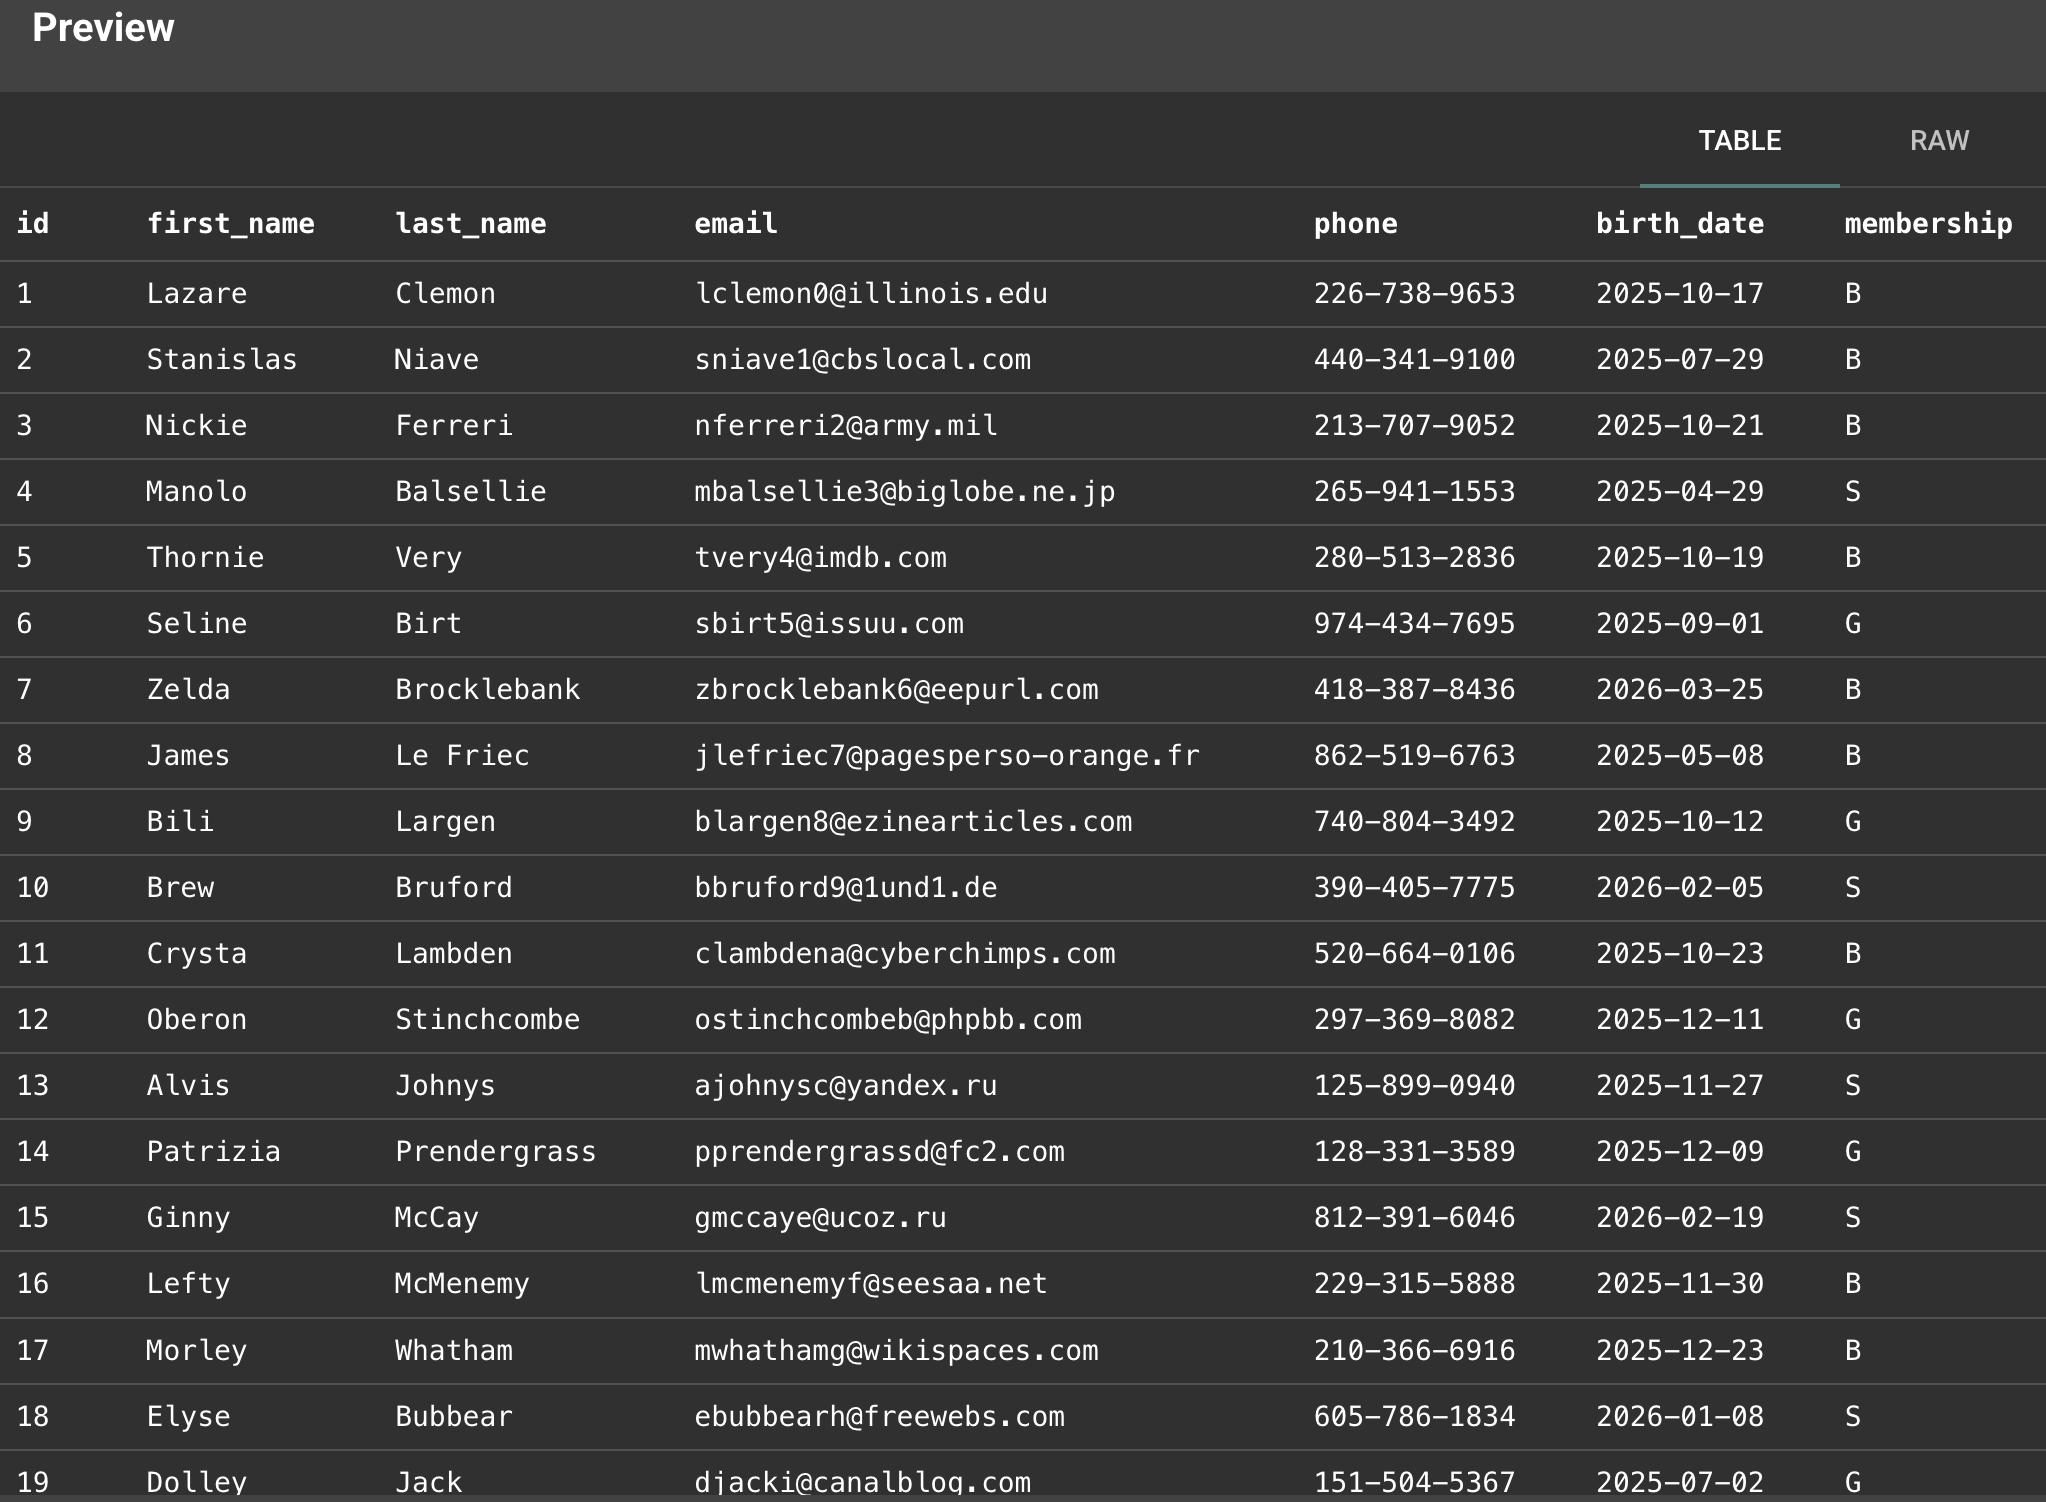
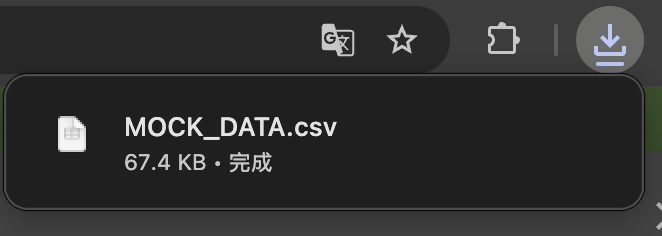
如果预览结果符合预期,我们就可以点击【GENERATE DATA】来下载 CSV 文件:
现在我们把导出格式切换为 SQL,并修改表名:
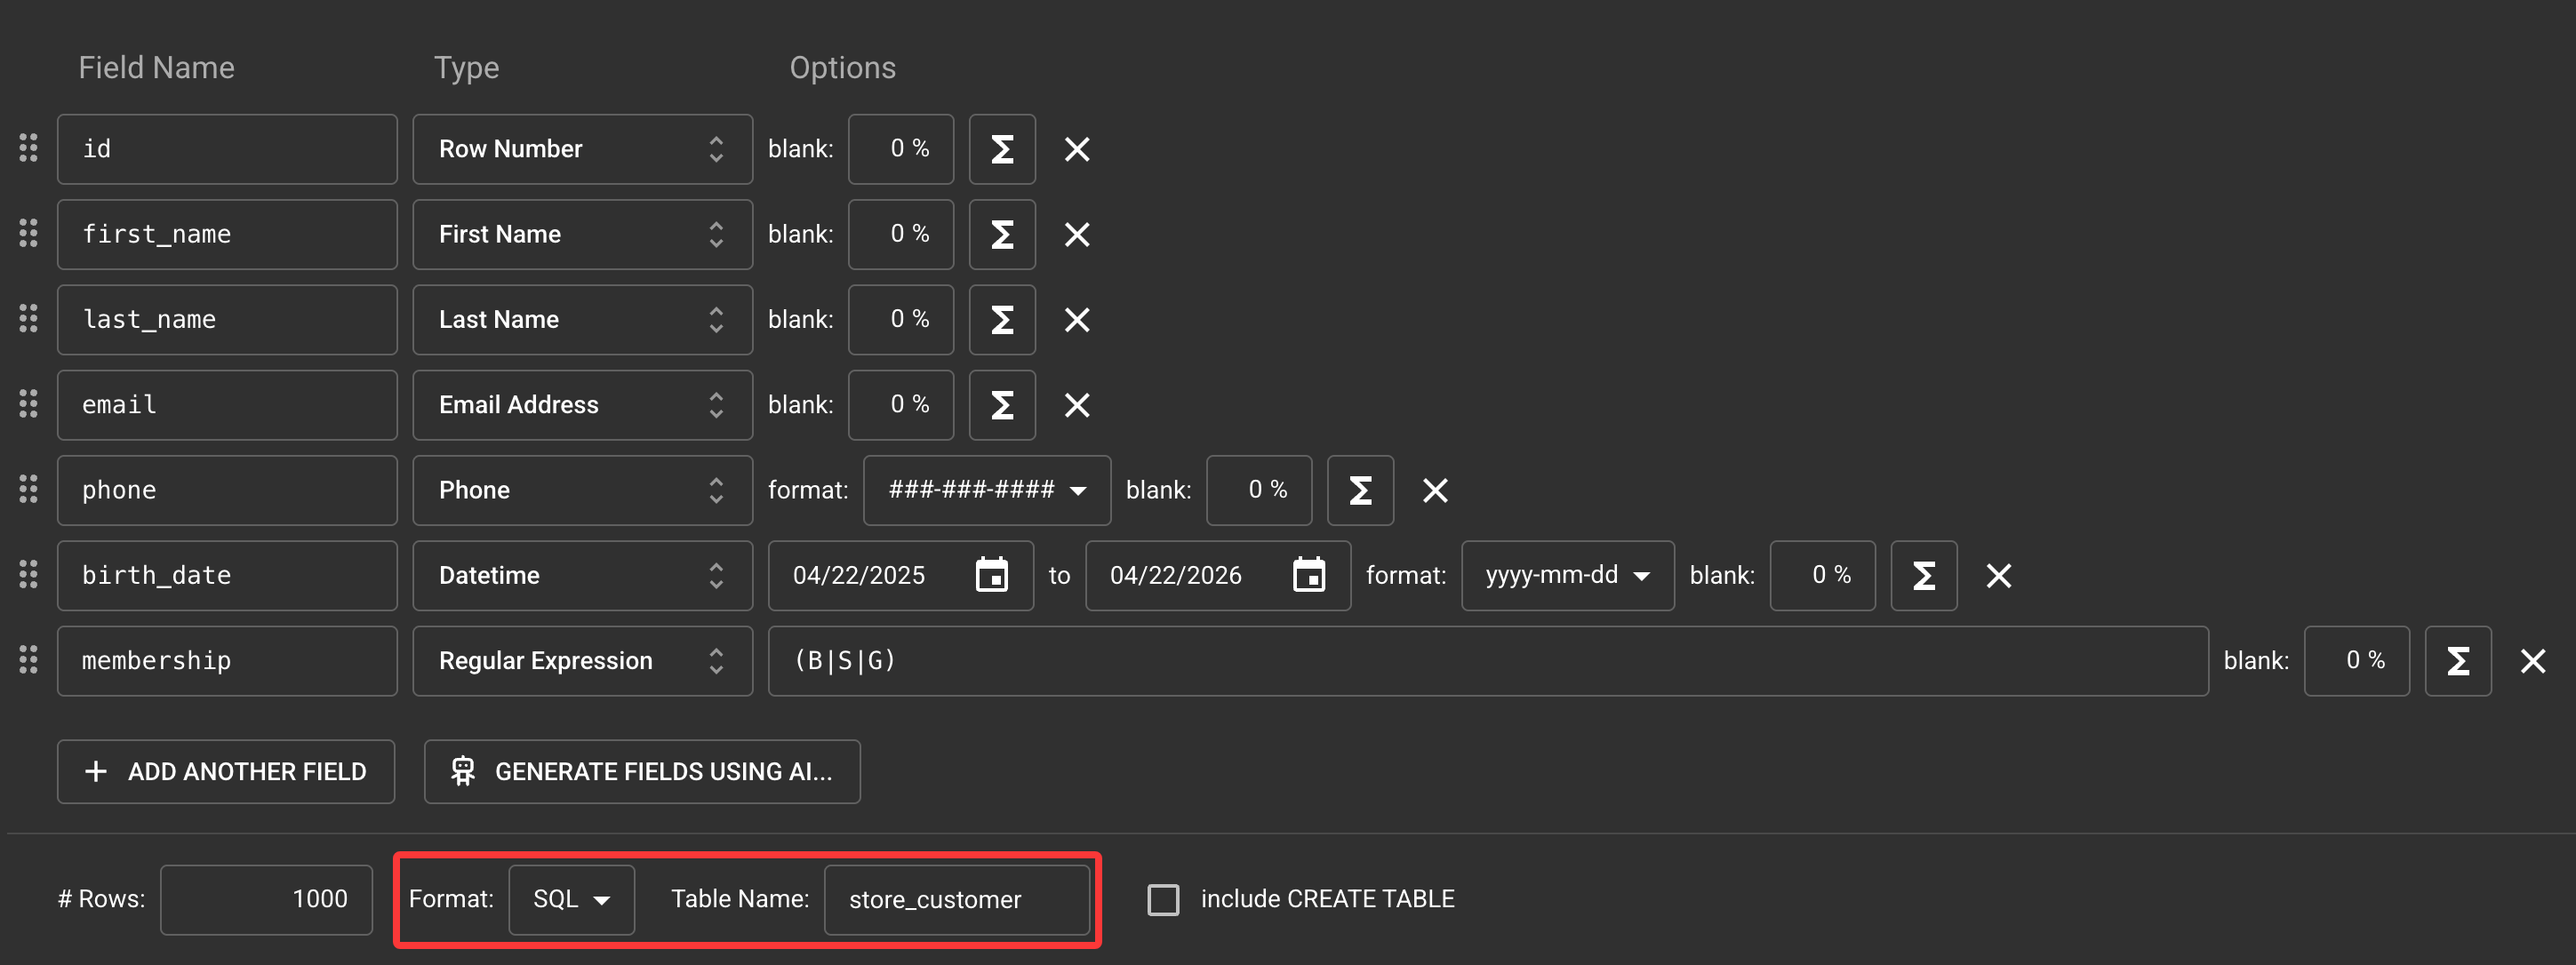
再次预览:
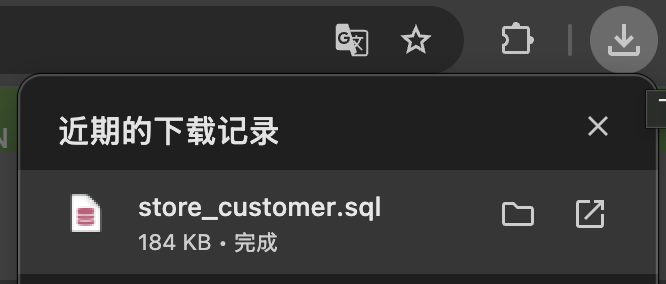
如果预览结果符合预期,我们就可以点击【GENERATE DATA】来下载 SQL 文件:
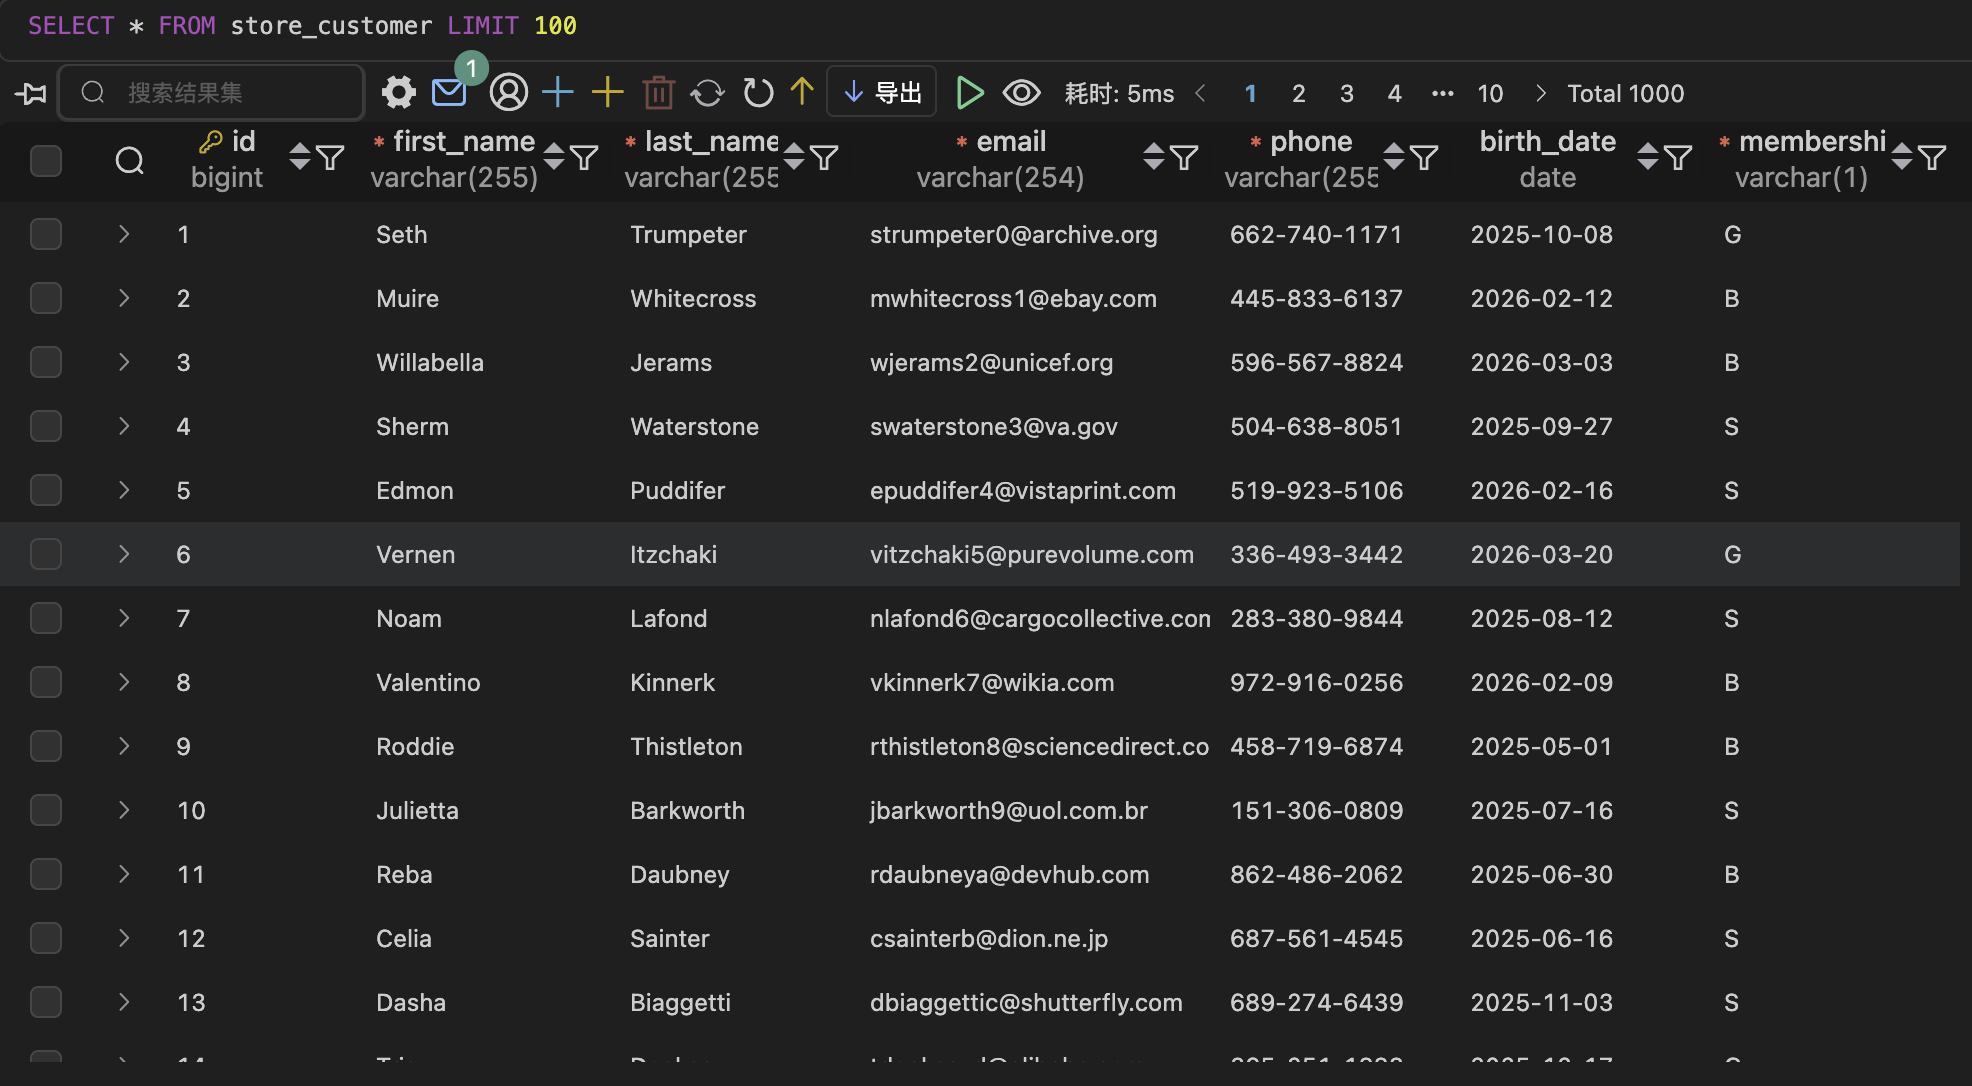
将文件拖入到 VS Code 中,选择数据库后选中全部内容,点击右上角的绿色运行按钮执行:

刷新数据库表结构,此时就可以看到 store_customer 表中新增了 1000 条数据: